More actions
No edit summary |
No edit summary |
||
| Line 195: | Line 195: | ||
<div class="mw-collapsible-content"> | <div class="mw-collapsible-content"> | ||
=== | == The Leviathan Strategy Guide == | ||
'''Optimal | <div class="mw-collapsible mw-collapsed"> | ||
* [https://oldschool.runescape.wiki/w/Zaryte_crossbow Zaryte crossbow] | === Combat Options === | ||
* [https://oldschool.runescape.wiki/w/Masori_body Masori body] | <div class="mw-collapsible-content"> | ||
* [https://oldschool.runescape.wiki/w/ | |||
{| class="wikitable" style="width:100%;" | |||
! Option | |||
! Recommended Setting | |||
! Effect | |||
|- | |||
| '''Shadow Spells''' | |||
| ❌ Disabled | |||
| <span style="color:#f00">Triggers special attacks</span><br>Reduces prayer cycling efficiency | |||
|- | |||
| '''Diamond Bolt Swap''' | |||
| ✔ Enabled | |||
| <span style="color:#090">+25% damage</span> when Leviathan is low health | |||
|- | |||
| '''Webweaver Bow''' | |||
| ⚠ Conditional | |||
| <span style="color:#fa0">Powerful specs</span> but requires inventory space | |||
|} | |||
</div> | |||
</div> | |||
=== Recommended Loadout === | |||
'''Optimal Ranged Setup:''' | |||
* Weapon: [https://oldschool.runescape.wiki/w/Zaryte_crossbow Zaryte crossbow] (or [https://oldschool.runescape.wiki/w/Dragon_crossbow Dragon crossbow]) | |||
* Ammo: [https://oldschool.runescape.wiki/w/Ruby_bolts(e) Ruby bolts (e)] → [https://oldschool.runescape.wiki/w/Diamond_bolts(e) Diamond bolts (e)] swap | |||
* Body: [https://oldschool.runescape.wiki/w/Masori_body(f) Masori body (f)] | |||
* Legs: [https://oldschool.runescape.wiki/w/Masori_chaps(f) Masori chaps (f)] | |||
'''Special Attack Options:''' | |||
* [https://oldschool.runescape.wiki/w/Webweaver_bow Webweaver bow] (if bringing) | |||
* [https://oldschool.runescape.wiki/w/Dragon_claws Dragon claws] (alternative) | |||
=== Quick Tips === | |||
1. ❌ '''Disable shadow spells''' for smoother prayer cycling | |||
2. ✔ '''Bring diamond bolts''' for execute phase (below 30% HP) | |||
3. ⚠ '''Webweaver bow''' only if comfortable with mechanics | |||
4. Focus on prayer switches during special attacks | |||
5. Stay mobile during whirlpool phase | |||
</div> | </div> | ||
Revision as of 23:54, 28 March 2025
Desert Treasure 2 Bosses
Boss Configuration
Getting Started
Upon starting the script:
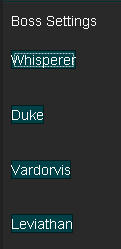
- Navigate to the Boss Settings tab
- Select which bosses to fight:
  * The Whisperer
  * Duke Sucellus
  * Vardorvis
  * The Leviathan

Boss Rotation Settings

Rotation Controls:
- ✔ Enable/disable each boss individually
- 🔄 Default rotation order (Not changeable):
 1. Duke Sucellus
 2. The Whisperer
 3. Vardorvis
 4. The Leviathan
Swap Conditions (per boss):
- Minimum kills: [Input number]
- Maximum kills: [Input number]
- Minimum time (minutes): [Input number]
- Maximum time (minutes): [Input number]
- ✔ Swap after each Ancient axe piece acquired
Gear Management
Advanced Options:
- ✔ Sell gear for current boss to upgrade for next boss
- Gold threshold: [Input amount]
- Item value threshold: [Input amount]
Recommended Setups
Desert Treasure 2 Bosses
Duke Sucellus
Recommended Gear
Budget (10M):
Optimal (50M+):
Duke Sucellus Gear Guide
5-Tick Setup (Beginner Friendly)
| Slot | Premium Gear | Budget Alternative |
|---|---|---|
| Head | Neitiznot faceguard | Serpentine helm |
| Body | Bandos chestplate | Fighter torso |
| Legs | Bandos tassets | Obsidian legs |
| Weapon | Abyssal whip + Dragon defender | Zamorakian spear |
| Other | Fire cape Amulet of torture Primordial boots |
Obsidian cape Amulet of fury Dragon boots |
4-Tick Setup (Advanced)
| Slot | Premium Gear | Budget Alternative |
|---|---|---|
| Head | Torva full helm | Neitiznot faceguard |
| Body | Torva platebody | Bandos chestplate |
| Legs | Torva platelegs | Bandos tassets |
| Weapon | Osmumten's fang | Ghrazi rapier |
| Other | Infernal cape Amulet of torture Primordial boots |
Fire cape Amulet of fury Dragon boots |
Special Attack Weapons
| Weapon | Spec Energy |
|---|---|
| Dragon claws | 50% |
| Voidwaker | 50% |
| Bandos godsword | 50% |
| Dragon dagger | 25% |
The Leviathan
The Leviathan Strategy Guide
Combat Options
| Option | Recommended Setting | Effect |
|---|---|---|
| Shadow Spells | ❌ Disabled | Triggers special attacks Reduces prayer cycling efficiency |
| Diamond Bolt Swap | ✔ Enabled | +25% damage when Leviathan is low health |
| Webweaver Bow | ⚠ Conditional | Powerful specs but requires inventory space |
Recommended Loadout
Optimal Ranged Setup:
- Weapon: Zaryte crossbow (or Dragon crossbow)
- Ammo: Ruby bolts (e) → Diamond bolts (e) swap
- Body: Masori body (f)
- Legs: Masori chaps (f)
Special Attack Options:
- Webweaver bow (if bringing)
- Dragon claws (alternative)
Quick Tips
1. ❌ Disable shadow spells for smoother prayer cycling 2. ✔ Bring diamond bolts for execute phase (below 30% HP) 3. ⚠ Webweaver bow only if comfortable with mechanics 4. Focus on prayer switches during special attacks 5. Stay mobile during whirlpool phase
Vardorvis
Recommended Gear
Budget (10M):
Optimal (50M+):
The Whisperer
The Whisperer Strategy Guide
Ghost Phase Options
Ranged Weapon Choice:
 * Better for multi-target damage
 * More expensive to operate
 * Faster single-target damage
 * Cheaper to maintain
Movement Control Options
Spellbook Choices:
- Freeze spells (Standard spellbook)
 * Ice Barrage recommended
 * Roots enemy in place
- Grasp spells (Arceuus spellbook)
 * Ghostly Grasp
 * Provides damage over time
Special Attack Options
Accursed Scepter:
 * Special attack reduces defense
 * Useful for faster kills
 * Requires inventory space
Recommended Loadouts
| Style | Budget Setup | Optimal Setup |
|---|---|---|
| Ghost Phase | Toxic blowpipe | Venator bow |
| Movement Control | Ice Burst | Ice Barrage |
| Special Attack | Accursed Sceptre | Accursed Sceptre |